

For rainy Seattle rides, set your saddle height for efficient leg extension, then lower it slightly only if you need extra control. Seattle averages about 34 inches of annual precipitation, while winter months regularly produce several inches monthly. A proper road bike fit for 5 11 rider also matters because frame size and saddle position work together.
Key Takeaways
- Keep your normal saddle height unless wet conditions reduce confidence.
- Use a small adjustment instead of making dramatic height changes.
- Check knee extension, hip stability, and foot control after adjusting.
- Prioritize traction and braking control on wet Seattle pavement.
- Test adjustments before committing to a longer rainy route.
- Return to your baseline height when normal riding conditions return.
Why Rain Changes Saddle Height Decisions
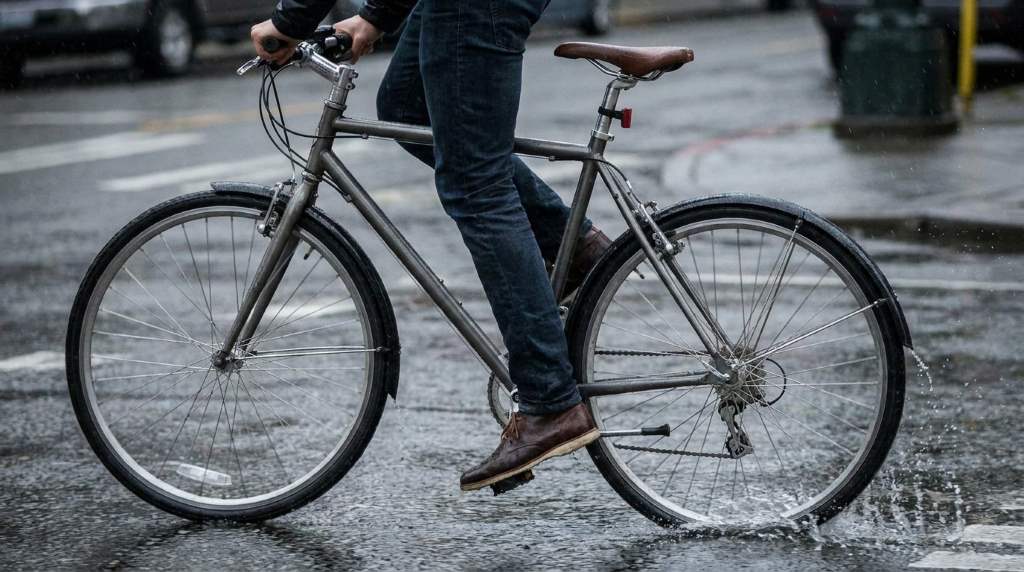
Rain does not automatically require a lower saddle, but it changes how confidently you control the bicycle. Wet pavement can reduce available traction, especially around painted markings, metal covers, leaves, and smooth surfaces.
Seattle’s climate makes this distinction particularly useful for regular riders. The National Weather Service records substantial precipitation during Seattle’s cooler months, with December’s normal precipitation around 5.72 inches.
Therefore, saddle adjustment should address control rather than simply reacting to rainfall. If your normal position already gives stable handling, keeping it unchanged usually preserves your pedaling efficiency.
However, riders who feel nervous stopping on slick roads may benefit from a modest reduction. A slightly lower position can make controlled foot placement easier during slow stops, although it should not replace proper technique.
For longer rides, hydration and fatigue also influence your posture and control. A useful stay hydrated during long workouts approach can help maintain concentration when weather adds extra demands.
Find Your Baseline Saddle Height First
Before making a rainy-weather adjustment, establish the saddle height that works during normal dry rides. Measure from the center of the bottom bracket to the saddle’s seating reference point.
Then sit naturally on the bicycle while wearing your usual riding shoes. Place your heel on the pedal and rotate the crank until the pedal reaches its lowest position.
Your knee should become nearly straight without forcing your pelvis to rock from side to side. Switch back to your normal pedaling position afterward and confirm that your knee retains a comfortable, controlled bend.
Next, ride slowly for several minutes and observe your hips. Excessive hip rocking usually indicates excessive saddle height, while persistent knee compression can indicate insufficient height.
Use a Repeatable Measurement
Mark your seatpost position with removable tape before testing any change. This simple reference lets you return precisely to your preferred baseline.
Also record the measurement in millimeters if possible. Small changes become easier to evaluate when you can compare exact positions rather than relying on memory.
Because saddle height interacts with frame geometry, saddle setback, crank length, and shoe setup, avoid changing several variables simultaneously. One adjustment produces clearer feedback.
How Much Should You Lower the Saddle?
For most rainy Seattle trips, start with no adjustment and evaluate your confidence first. If you genuinely need more low-speed control, lower the saddle by roughly 3 to 5 millimeters.
That amount sounds minor, but experienced cyclists can notice meaningful changes in leg extension and hip position. Larger reductions can unnecessarily compromise pedaling mechanics during sustained climbs or longer distances.
After lowering the saddle, ride on a quiet, familiar street before entering busier traffic. Practice starting, stopping, turning, and braking while maintaining a relaxed upper body.
If your knees feel noticeably more compressed, restore some height. Likewise, if your hips begin rocking, the saddle may have moved too far downward or another fit variable may be responsible.
When You Should Not Lower It
Do not lower your saddle simply because rain appears in the forecast. A correct riding position remains important when wet conditions already demand smooth, efficient pedaling.
Instead, focus on braking technique, tire condition, visibility, and predictable handling. Seattle’s transportation guidance specifically advises cyclists to account for roadway conditions and hazards while riding.
Furthermore, avoid using saddle height as a substitute for a properly fitted bicycle. If you routinely struggle to reach the ground comfortably, investigate frame size and overall fit first.
Rainy-Ride Saddle Setup: A Practical Test
Once you choose a potential adjustment, use a short testing sequence before starting your main trip. This approach separates genuine control improvements from changes that merely feel different.
Start with a five-minute easy ride on relatively smooth pavement. Then perform several gradual stops, maintaining light pressure on both brakes instead of making abrupt inputs.
Next, make slow turns and brief standing transitions. Your goal is to determine whether the lower position improves confidence without disrupting your normal pedal stroke.
Finally, ride for ten minutes at your usual cadence. If your hips remain stable and your knees feel natural, the adjustment may suit your conditions.
Check These Four Signals
- Hip stability: Your pelvis should remain controlled throughout the pedal stroke.
- Knee comfort: Avoid excessive compression or uncomfortable extension.
- Foot control: You should confidently manage slow stops without compromising balance.
- Pedaling efficiency: Your normal cadence should remain comfortable and consistent.
If one signal deteriorates, return toward your original saddle height. The best rainy-weather setup should improve confidence without creating a new biomechanical problem.
Match Saddle Height With Wet-Weather Equipment
Saddle height works within a larger riding system, so equipment choices can affect how stable the bicycle feels. Tire pressure, tread, footwear, clothing, and braking components all influence wet-weather confidence.
For riders using trail-capable bicycles, choosing suitable equipment becomes particularly important on mixed surfaces. A guide covering best hardtail mountain bikes under 500 can provide useful context when comparing affordable trail-oriented setups.
However, avoid assuming a mountain-bike-style setup automatically solves wet-road problems. Tire condition and appropriate pressure still matter more than simply adding aggressive tread.
Likewise, check your pedals and shoes before leaving. Wet conditions can make an insecure foot interface more noticeable during starts, stops, and unexpected surface changes.
Do Not Ignore Your Brakes
Wet conditions require deliberate braking because available traction can change quickly. Apply both brakes progressively and leave additional space before intersections and other traffic.
Seattle also advises cyclists to avoid standing water because it can conceal hazards. Therefore, saddle height should never encourage you to ride through water merely for convenience.
Combine Saddle Position With Better Riding Technique
A lower saddle cannot compensate for abrupt steering or aggressive braking on slick pavement. Instead, maintain smooth inputs and reduce speed before corners, painted surfaces, and unfamiliar sections.
Keep your weight balanced rather than leaning excessively toward the handlebars. A relaxed grip allows the front wheel to track changing surfaces more naturally.
Additionally, scan farther ahead than you would during a dry ride. Early hazard recognition gives you more time to brake gradually and select a safer line.
Seattle contains hills, bridges, intersections, bike lanes, and mixed traffic environments. Consequently, predictable positioning and conservative speed often matter more than a few millimeters of saddle adjustment.
Build a Rain-Specific Pre-Ride Check
- Saddle: Confirm the height mark remains unchanged or matches your planned adjustment.
- Tires: Check pressure, tread condition, and visible damage.
- Brakes: Confirm both levers engage smoothly and predictably.
- Visibility: Use appropriate lights and reflective elements during poor conditions.
- Route: Avoid known standing-water areas and unnecessarily hazardous sections.
Helmet fit deserves the same attention as saddle position because wet-weather riding can reduce visibility and increase environmental distractions. Before departure, review guidance on choose the best bike helmet and confirm your helmet sits securely.
Common Saddle-Height Mistakes During Rainy Trips
The biggest mistake involves making a large adjustment immediately before a long ride. Your body needs time to adapt to changes in saddle height, even when the change seems small.
Another mistake involves lowering the saddle because reaching the ground feels difficult. Your saddle should support effective pedaling rather than function like a chair during every stop.
Some riders also raise the saddle to gain extra leg extension after wearing thicker rain gear. Clothing can change comfort, but it rarely justifies altering a properly established fit.
Finally, riders sometimes blame saddle height for problems caused by tire pressure or poor braking confidence. Diagnose the complete setup before changing your position.
How to Adjust the Saddle Safely Before Departure
Place the bicycle on stable ground and loosen the seatpost clamp according to its design. Never force the post or exceed the manufacturer’s minimum insertion mark.
Measure your existing position before moving anything. Then make one small adjustment and tighten the clamp to the manufacturer’s specified torque when applicable.
After tightening, hold the saddle firmly and check for movement. A loose saddle creates a serious handling problem and can damage the seatpost or frame.
Take a short test ride before beginning your planned route. If the position feels wrong, stop and correct it rather than trying to adapt during traffic.
When a Professional Bike Fit Makes More Sense
Consider a professional fit if you repeatedly experience knee discomfort, hip rocking, numbness, or persistent saddle pressure. Repeated symptoms usually indicate a broader fit issue rather than weather alone.
A fitter can evaluate saddle height alongside reach, setback, handlebar position, cleat alignment, and frame geometry. That broader assessment produces more reliable results than repeatedly changing saddle height.
This becomes especially valuable for riders covering long distances around Seattle. A comfortable position can reduce unnecessary fatigue and help you maintain consistent control throughout changing conditions.
Professional fitting also helps distinguish preference from mechanical necessity. Rain should influence riding strategy, but it should not dictate an unsuitable permanent bicycle position.
Final Rainy Seattle Saddle-Height Checklist
Before leaving, confirm that your saddle matches your tested position and that the seatpost remains secure. Then inspect tires, brakes, lights, clothing, and route conditions.
If rain simply makes the pavement wet, your normal saddle height may remain ideal. If you need additional low-speed confidence, test a modest 3 to 5 millimeter reduction.
Most importantly, make the adjustment before the ride rather than improvising on the road. Give yourself enough time to test the position in controlled conditions.
Seattle’s wet roads reward preparation, smooth handling, and conservative decision-making. Set your saddle deliberately, test your setup, and choose control over unnecessary speed whenever conditions deteriorate.
Conclusion
For rainy Seattle trips, keep your established saddle height unless wet conditions genuinely reduce your control. If necessary, lower it only 3 to 5 millimeters, then test your knee position, hip stability, and stopping confidence.
Now mark your preferred saddle position, inspect your bicycle, and complete a short wet-weather test ride. If recurring fit problems remain, book a professional bicycle fitting before your next long Seattle trip.
Frequently Asked Questions
Should I lower my saddle when cycling in rain?
No, lower it only slightly if you need improved low-speed control without disrupting your normal pedaling mechanics.
How many millimeters should I lower my saddle?
Start with approximately 3 to 5 millimeters and evaluate your knee comfort, hip stability, and handling.
Does wet pavement affect saddle height?
Wet pavement does not inherently change correct saddle height, although it can change your confidence during slow maneuvers.
Should I lower my saddle for Seattle hills?
Not automatically, because proper saddle height supports efficient climbing and should remain consistent unless testing shows otherwise.
What matters more than saddle height during rain?
Traction, braking technique, visibility, tire condition, route selection, and controlled speed usually matter more.