
Imagine sprinting through a muddy trail, your shoes soaked from a recent swim, only to feel the weight of water dragging you down. That was me during my first swimrun race, struggling with heavy, waterlogged trail shoes. I quickly learned that proper drainage is key in swimrun, a sport blending open-water swimming and trail running. By adding DIY drainage holes to my running shoes, I transformed my experience, boosting comfort and speed. In this guide, I’ll share how to create drainage holes in your swimrun shoes, like the HOKA Speedgoat or Inov-8 X-Talon, to enhance your race performance. Whether you’re prepping for a race in the Swedish archipelago or tackling Lake Norman, this post will educate, demonstrate, and fascinate you with practical tips and personal insights to conquer wet terrains.
Why Drainage Holes Matter in Swimrun Shoes
Swimrun shoes, like the HOKA Speedgoat or Inov-8 X-Talon, face unique challenges. Unlike standard trail shoes, they endure repeated soaking during open-water swimming, making water retention a major issue. Waterlogged shoes can weigh up to a kilo, slowing you down and increasing blister risk. According to a 2023 report by running expert Mike R., shoes with poor drainage can reduce running efficiency by 10% on wet terrains. Drainage holes allow water to escape quickly, keeping shoes lightweight and reducing friction.
Adding holes to your swimrun shoes, such as the Saucony Peregrine 15 or VIVOBAREFOOT Hydra ESC, isn’t just a hack—it’s a necessity. During my second race, I noticed competitors with modified shoes breezing through transitions. Inspired, I drilled small holes in my HOKA Speedgoat 4, and the difference was night and day. My feet felt lighter, and I avoided the blisters that plagued my first event. This simple modification can elevate your performance across varied terrains like the Blue Ridge Mountains.
Choosing the Right Shoes for DIY Drainage Holes
Not all trail running shoes are ideal for swimrun or DIY modifications. Look for quick-drying shoes with mesh fabrics, like the Inov-8 Mudclaw 300 or Altra Lone Peaks, which naturally support drainage. Shoes with rubber spikes, such as the La Sportiva Bushido, offer excellent grip on slippery surfaces, crucial for swimrun’s rocky shorelines. Avoid waterproof shoes, as they trap water, negating the benefits of drainage holes.
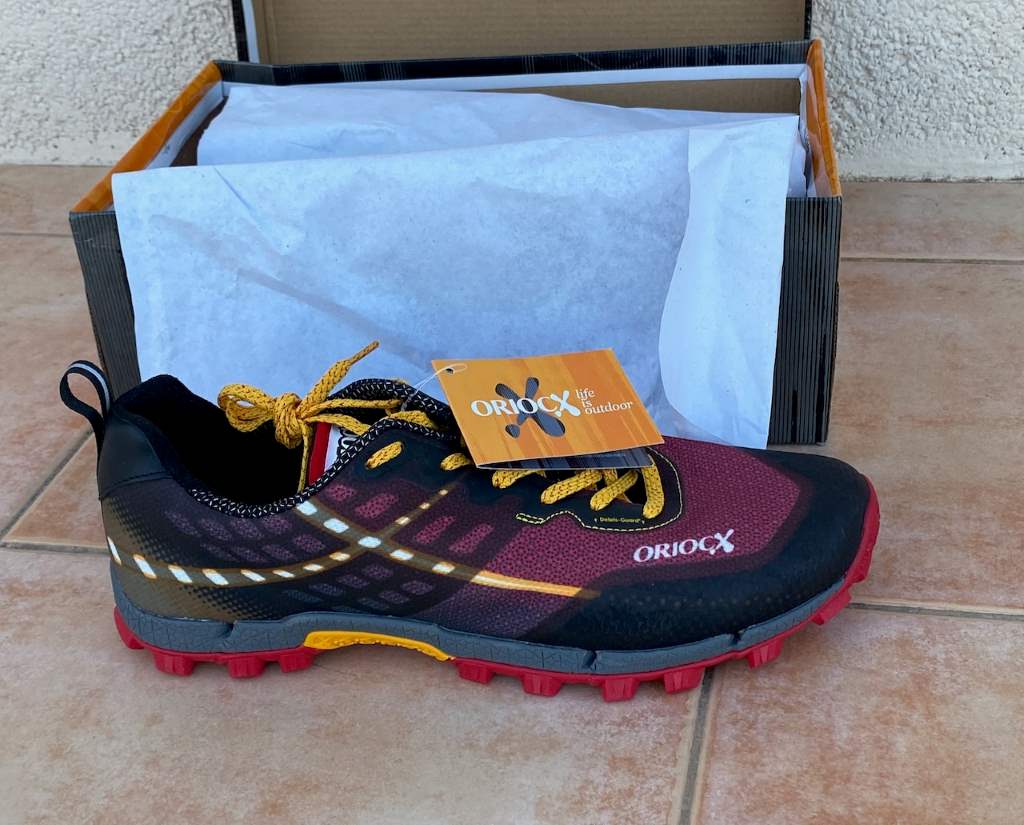
When I chose my HOKA Speedgoat for modification, its breathable mesh upper and grippy sole made it perfect. The Primus Trail Shoe or Oriocx Etna 21 Pro, with its Shark Drain system, are also great candidates. Ensure your shoes fit snugly—loose shoes can let grit enter through holes, causing discomfort. Test your shoes in a bucket of water before drilling to confirm they drain poorly without modifications. This step saved me from ruining a perfectly good pair of Salomon TechAmphibian shoes.
Tools and Materials Needed for DIY Drainage Holes
Creating drainage holes requires minimal tools, making this a budget-friendly hack. You’ll need a power drill with a 3-4mm bit, a marker, and sandpaper to smooth edges. A pair of synthetic ankle socks, like Gococo knee-length wool socks, can prevent debris entry. If you’re using a GPS watch or tracker, ensure it’s secured to avoid interference while drilling.
I gathered my tools from a local hardware store for under $20, a small price for the performance boost. For my Inov-8 Terraclaw 250, I used a fine drill bit to avoid damaging the sole’s integrity. If you’re new to DIY, practice on an old pair of training shoes first. This approach builds confidence and ensures you don’t compromise your race gear. Always wear protective gloves to stay safe while drilling.
Step-by-Step Guide to Drilling Drainage Holes
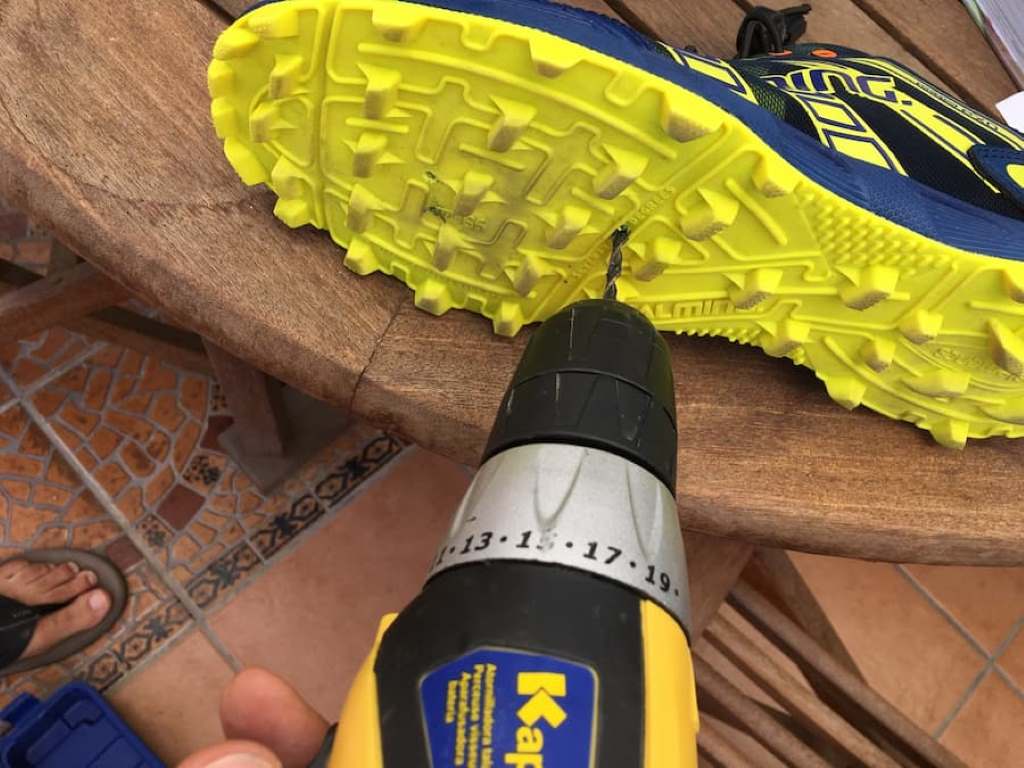
Modifying your swimrun shoes is straightforward if you follow these steps. First, clean your shoes to remove dirt. Mark two spots under the ball of each foot and one on each side where the upper meets the sole, near the big and little toes. Use a 3-4mm drill bit to create small holes—too large, and grit enters; too small, and drainage suffers. Smooth edges with sandpaper to prevent irritation.
During my first attempt, I drilled four holes in my Icebug NewRun shoes, following advice from swimrun-advice.com. The process took 10 minutes, and after a test run, water drained in seconds. For shoes like the Mizuno trail running shoes, ensure holes don’t compromise the sole’s structure. Test your modified shoes in open water to confirm drainage efficiency before race day. This hack made my transitions smoother at a British Columbia event.
Steps for Drilling Drainage Holes:
- Clean shoes thoroughly.
- Mark drilling spots with a marker.
- Drill 3-4mm holes at marked points.
- Smooth edges with sandpaper.
- Test drainage in water.
Pros and Cons of DIY Drainage Holes
Adding drainage holes has clear benefits but also risks. They reduce shoe weight, improve comfort, and prevent blisters, enhancing performance in races like the Swimrun championships. However, improper drilling can weaken shoe structure or allow debris entry, causing discomfort. My modified HOKA Speedgoat 4 drained water in five steps, mimicking the Oriocx Etna 21 Pro’s Shark Drain system, but I once drilled too large a hole, letting sand in during a race.
Pros:
- Reduces shoe weight by up to 1kg.
- Minimizes blister risk.
- Enhances transition speed.
Cons:
- Risk of structural damage if drilled incorrectly.
- Potential for grit or sand entry.
- Not suitable for all shoe types, like waterproof models.
Always weigh these factors and test modifications in training. My experience at Lake Norman taught me to keep holes small to avoid debris issues.
Common Mistakes to Avoid When Adding Drainage Holes
DIY drainage holes can go wrong without care. A common error is drilling too many or oversized holes, weakening the shoe or allowing debris entry. Another mistake is neglecting to smooth hole edges, leading to skin irritation. I learned this the hard way when rough edges on my Elements 3 shoes caused minor abrasions during a long race.
Avoid drilling near critical support areas, like the midsole, to maintain shoe integrity. Don’t skip the water test—my friend ruined a pair of VIVOBAREFOOT Primus shoes by assuming they’d drain well. Use a marker to plan holes precisely, and never rush the process. Consulting resources like swimrun-advice.com can prevent costly errors.
Enhancing Swimrun Performance with Complementary Gear
Drainage holes work best when paired with other swimrun gear. A swimrun wetsuit, like the Orca Vanir Flex, offers flexibility for running and swimming. Pull buoys, such as the Speedo Pull Buoy, counter shoe drag in water. Swim paddles, like Frank Paddles, boost swim efficiency, while neoprene calf guards add buoyancy. I used a collapsible water bottle and race belt to stay hydrated during long runs, complementing my modified shoes.
During a race in the Swedish archipelago, my Synergy Swimrun Wetsuit and modified Inov-8 X-Talon shoes worked in harmony. The wetsuit’s front zipper and my shoes’ drainage holes made transitions seamless. Pair your shoes with a GPS tracker to monitor pace, ensuring you meet race cut-off times. These additions, combined with drainage holes, create a streamlined race setup.
My Swimrun Transformation
My first swimrun race was a wake-up call. And, my unmodified trail shoes felt like anchors, slowing me down on rocky trails. After researching on forums like Slowtwitch, I decided to drill holes in my HOKA Speedgoat 4. The process was nerve-wracking, but the result was transformative. At my next race, I shaved minutes off transitions, and my feet stayed blister-free. This DIY hack, paired with a pull buoy and swim goggles, made me feel like a pro, even as an age grouper.
Sharing this tweak with my swimrun team at a Blue Ridge Mountains event sparked a gear swap meet. We exchanged tips on everything from tri kits to compressive shorts. The camaraderie and improved performance fueled my love for swimrun. If I can turn a soggy race into a triumph, so can you with this simple modification.
Master Swimrun with DIY Drainage Holes
DIY drainage holes in swimrun shoes, like the Inov-8 X-Talon or HOKA Speedgoat, are a game-changer for tackling wet terrains. This hack reduces weight, prevents blisters, and boosts transition speed, making races in places like British Columbia more enjoyable. By following the steps outlined, using the right tools, and pairing with gear like a swimrun wetsuit or pull buoy, you’ll elevate your performance. My journey from waterlogged shoes to a streamlined setup proves this tweak’s value. Try it, test it, and share your results in the comments below or on social media. Let’s make every swimrun adventure epic!
Have you tried drilling drainage holes in your swimrun shoes? Share your experience or ask questions in the comments! Don’t forget to share this guide with your swimrun team.
FAQs
Why do swimrun shoes need drainage holes?
Drainage holes allow water to escape quickly, reducing shoe weight and blister risk during swimrun races.
Which shoes are best for adding drainage holes?
Trail shoes like HOKA Speedgoat, Inov-8 X-Talon, or VIVOBAREFOOT Hydra ESC with mesh fabrics work best.
How many drainage holes should I drill?
Drill four small holes (3-4mm): two under the ball of each foot, one near each toe.
Can drainage holes damage my shoes?
If done carefully, holes won’t harm shoes. Avoid large holes or drilling near critical support areas.
Where can I learn more about swimrun gear?
Check swimrun-advice.com or lowtideboyz.com for gear reviews and tips.